
+(2).jpg)
Monday, April 08, 2013

Saturday, May 07, 2011
Cinnamon, spice and all things nice
 I love hot cross buns, even the cheap and nasty ones from unnameable supermarkets. Yes, I know it's a deplorable confession from one who pursues all things slow.
But to be honest, I can't help it, and if I was honest, I am sure that I could think of at least another ten foods, where I embrace the culinary ready-made.
Food is an odd thing - its culture, history, sensory, it fills us with nostaglia and longing. That's the beauty of it. So when I surcome, it's because of a yearning for all the memories and sensations, the feeling of comfort that I get from that heavenly, ohh so heavenly combination of cinnamon, dried fruit and butter. The promise of this combination undoes me everytime, leading me to a state of non-discrimination and then disappointment.
So with Easter approaching, I am obsessing about hot cross buns and vow to myself to exercise the same discrimination that I do for every other food type! So here I go, here is a hot cross bun recipe.
Ingredients
325 gm raw caster sugar
1 lemon
1½ Granny Smith apples, unpeeled, cored, diced
1 cinnamon quill
750 gm (5 cups) plain flour - (Iused gluten-free flour)
150 gm sultanas or golden raisins
50 gm dried apple, diced 30 gm
candied orange, diced 14 gm
(2 sachets) dried yeast 3½ tsp
ground cinnamon
½ tsp allspice
Finely grated rind of 1 orange and 1 lemon
380 ml milk
100 gm butter coarsely chopped
1 egg
Preheat your oven to 220C.
Stir together 260gm sugar and 375ml water in a saucepan. Squeeze in the juice of half a lemon and stir over a medium heat until sugar dissolves. (This will be later used to glaze the chopped apple. Trust me, this is worth doing. The smell and taste is lemon fresh but equally warm and cozy.)
While the sugar and water are dissolving, cut the lemon into slices, add the Granny Smith apple and cinnamon quill. Bring to a simmer and then reduce to a medium heat. Cook until the lemon and apple are translucent. In this recipe, this is 20-25 minutes. Strain, reserving fruit and syrup separately. When cool enough dice lemon and combine with the apple.
 Now it is time to prepare the dry ingredients -place the flour, sultanas, dried apple, candied orange, yeast, 3 tsp ground cinnamon, allspice, rinds, remaining sugar, reserved apple mixture and 1 tsp salt in a large bowl. The sight of this alone makes it worth doing.


Place in a lightly buttered bowl, cover and stand in a warm place until doubled in size. This should take 30-40 minutes.
Divide your dough into 20 even pieces, then knead each piece into a smooth ball. Arrange dough balls into two concentric circles on a large round or rectangular baking tray lined with baking paper, leaving 1cm between each for dough to expand.
Cover with a tea towel and stand in a warm place until doubled in size (30-40 minutes).
Combine remaining flour and 70ml cold water in a bowl and stir to a smooth paste. Spoon into a piping bag fitted with a small plain nozzle and pipe a cross shape onto each bun.


Take the reserved syrup and cinnamon and heat in a small saucepan until syrupy. Brush thickly over hot buns, then transfer to a wire rack to cool.
The verdict: What can I say, I don't get gluten free flour. Whatever is not in it makes a huge different to the texture, no vicosity of the dough - is that a word, she asks. The buns were heavy, almost scone like. The taste and smell were wonderful but really... really, she cries. Mr Sloweater can do his own in future.
That's it... I'm returning to the store brought!
This recipe is from the April 2010 issue of Australian Gourmet Traveller.
Sunday, May 01, 2011
Food to live by: Terrine de Campagne
There are very few things that I shy away from in the kitchen. I love the promise of adventure that beckons from empty pans and a full larder.
So when a friend invited us to some house warming drinks, I immediately thought Terrine de Campagne. Rustic, warming with the promise of perfectly chilled champagne, there was no doubt that this was the dish of choice.
It’s a simple dish, uncomplicated despite being made in two stages. The first is the preparation of the ingredients that then sit overnight and the second is the cooking and the eating!
Served with bread, cornichons (those crisp, tart pickles), and some chutney, it’s a perfect dish that lasts up to a week.
Terrine de Campagne is a basic of the French kitchen, as you can see from every charcuterie and market that you visit. Everyone has a different recipe but the fundamentals remain the same – a earthly terrine with a depth of flavour, using local ingredients.
Where to begin
250g sliced bacon
a tablespoon of butter
1 onion, chopped
500g pork minced
250g veal, minced
250g chicken livers, finely chopped
2 cloves garlic, finely chopped
¼ teaspoon ground allspice
A pinch ground cloves
A pinch ground nutmeg
2 small eggs, beaten
2 tablespoons of cognac (the original recipe called for brandy)
salt and pepper to season
bay leaf
sprig of thyme
If you are feeling adventurous you could add pistachio nuts OR just jump right in there and include some preserved truffles. This I had intended to do but forgot! This is despite the fact that I had prepared all the recipes in advance.
Before moving onto the cooking process – the question of the terrine dish needs to be explored.
My desire to make a terrain came from my first visit to E. Dehillerin, that Aladdin’s cave of culinary wonderment, where I found in the basement, cast iron Chasseur dishes. I was sold except there was no way that I could cart home a terrine dish on the Eurostar. I would get one in London at the sales I told myself.
Well of course I didn’t, so when preparing to make this terrain I also looked at purchasing a terrine dish. Ummh, who would have thought they were so (and I mean so so) expensive. Seriously! So I used a cake tin instead – perfectly acceptable, especially when one has a petite kitchen, where space needs to be bartered for!
So let’s get to the cooking.
Preparation
Start by lining your terrine dish (or in my case, a cake tin) with bacon. Make sure that you retain a few slices that will be used to cover the terrain at the end of this first stage.
So when a friend invited us to some house warming drinks, I immediately thought Terrine de Campagne. Rustic, warming with the promise of perfectly chilled champagne, there was no doubt that this was the dish of choice.
It’s a simple dish, uncomplicated despite being made in two stages. The first is the preparation of the ingredients that then sit overnight and the second is the cooking and the eating!
Served with bread, cornichons (those crisp, tart pickles), and some chutney, it’s a perfect dish that lasts up to a week.
Terrine de Campagne is a basic of the French kitchen, as you can see from every charcuterie and market that you visit. Everyone has a different recipe but the fundamentals remain the same – a earthly terrine with a depth of flavour, using local ingredients.
Where to begin
250g sliced bacon
a tablespoon of butter
1 onion, chopped
500g pork minced
250g veal, minced
250g chicken livers, finely chopped
2 cloves garlic, finely chopped
¼ teaspoon ground allspice
A pinch ground cloves
A pinch ground nutmeg
2 small eggs, beaten
2 tablespoons of cognac (the original recipe called for brandy)
salt and pepper to season
bay leaf
sprig of thyme
If you are feeling adventurous you could add pistachio nuts OR just jump right in there and include some preserved truffles. This I had intended to do but forgot! This is despite the fact that I had prepared all the recipes in advance.
Before moving onto the cooking process – the question of the terrine dish needs to be explored.
My desire to make a terrain came from my first visit to E. Dehillerin, that Aladdin’s cave of culinary wonderment, where I found in the basement, cast iron Chasseur dishes. I was sold except there was no way that I could cart home a terrine dish on the Eurostar. I would get one in London at the sales I told myself.
Well of course I didn’t, so when preparing to make this terrain I also looked at purchasing a terrine dish. Ummh, who would have thought they were so (and I mean so so) expensive. Seriously! So I used a cake tin instead – perfectly acceptable, especially when one has a petite kitchen, where space needs to be bartered for!
So let’s get to the cooking.
Preparation
Start by lining your terrine dish (or in my case, a cake tin) with bacon. Make sure that you retain a few slices that will be used to cover the terrain at the end of this first stage.
 Melt your tablespoon of butter and cook a finely diced onion, until it is soft. Now mix together the onion with the pork, veal, chicken livers, garlic, allspice, cloves, nutmeg, eggs cognac and salt and pepper.
Now a quick word about my ingredients. The pork and livers came from my favourite butcher. The pork was minced; the livers were not. So be prepared to dice your livers -very roughly. A much less queasy experience that I had imagined. Now the veal proved more troublesome as my butcher does not do veal, presumably for ethnical reasons. I'm not sure; so, I ended up getting veal from Waitrose. Perfectly acceptable.
 Spread the mixture into the lined terrine, packing the terrine as you go. Note how the bacon hangs slightly over the edge of the dish. This makes folding easier, as you can see from the next picture.
  Use the remaining bacon slides to cover the terrine. Then cover with cling wrap and leave overnight in the fridge.
Cooking of the terrine
Set the oven to 180ºC (35OºF).
Now here I departed from my original recipe and turned to Julia Child, that original domestic goodness, who understood that careful instructions are needed for those women without domestic help!
So to cook this is what you need: aluminium foil to cover the terrine, a heavy lid (that I will explain in a moment), and a pan of boiling water.
Cover the terrine dish in aluminium foil and place in a pan of boiling water. The water needs to come half-way up the pan. I used a heavy roasting dish.
Place the terrine in the lower third of the pre-heated oven and bake for 1.5 hours. Now this is where I got all very nervous and thought I had undercooked the terrine and that I was likely to kill my host and partner! This did not happen. The terrine was absolutely perfect.
Julia recommends that the terrine is done when it has shrunk slightly from the dish. This it did and that the juices were clear. Now this is where I got confused. The side juices were clear but the middle juices were slightly pink.

Post-cooking and checking of juices, remove the terrine from the water and remove the foil. This is the stage, where you need to weigh down the terrain. All very easy: a cake tin, some cans and when it’s completely cool, put it in the fridge.
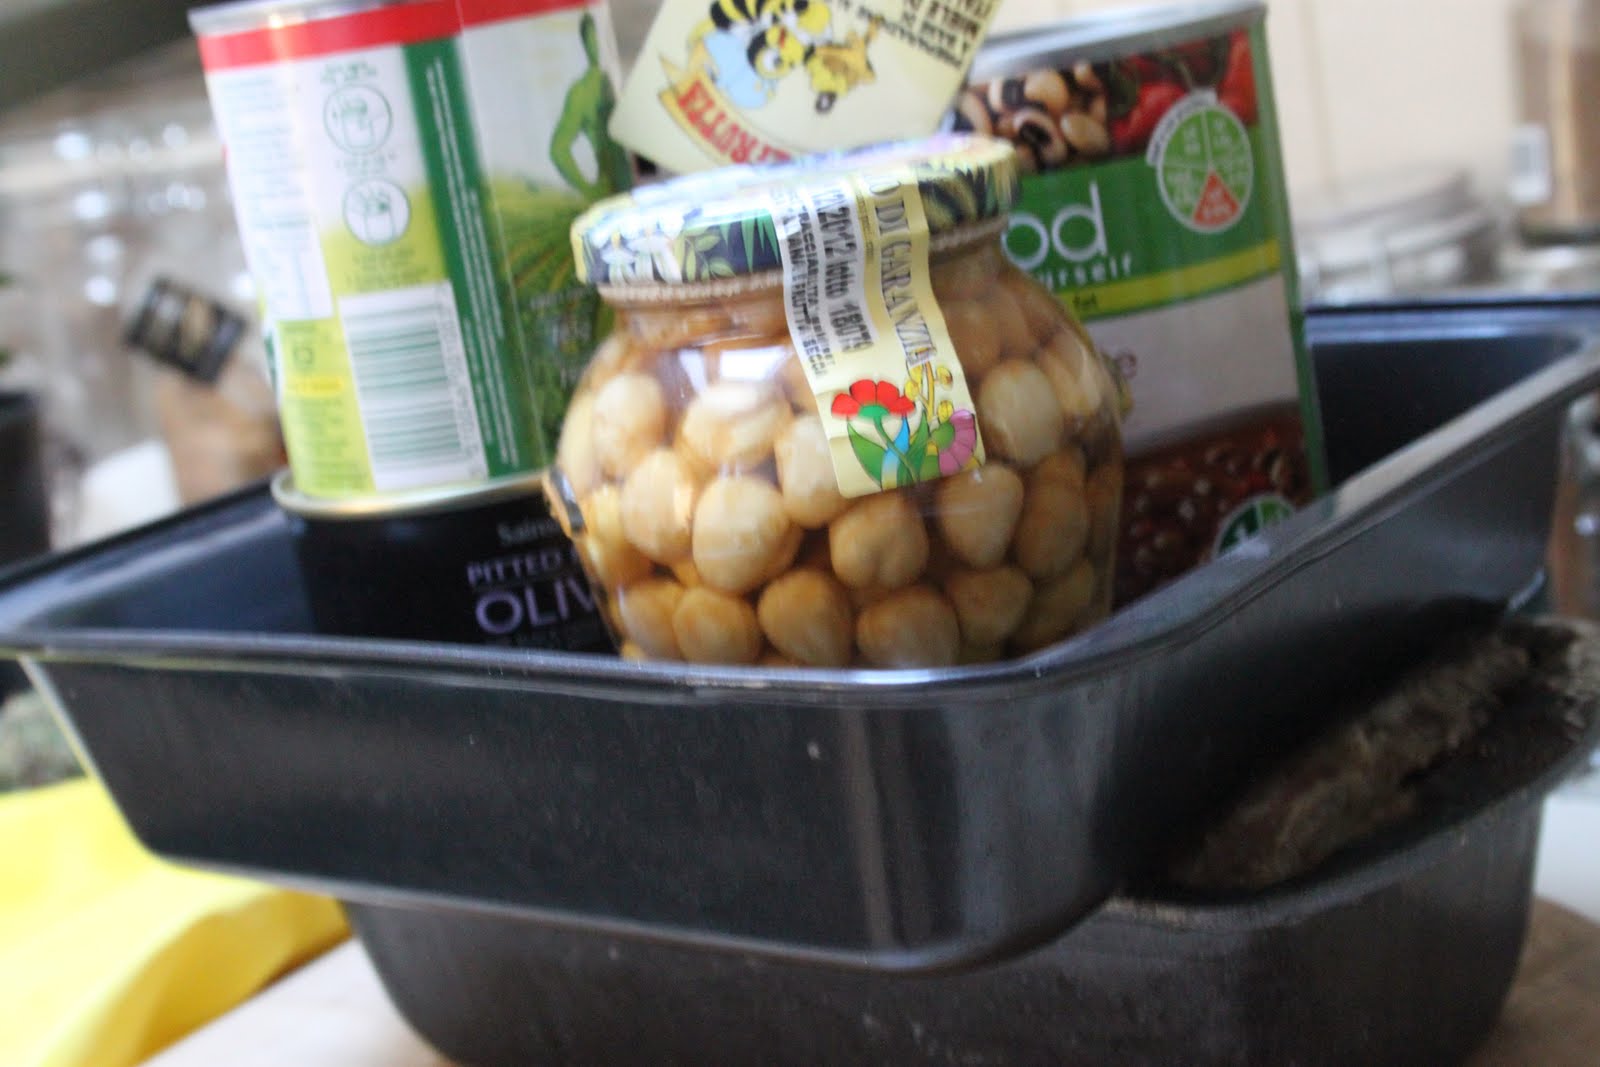 Now it was my intention to photo the terrine perfectly presented. That didn't happened but I promise you, the terrine was good, exceptionally good.
Sunday, February 20, 2011
Chocolate soufflé in a tiny kitchen
2011 is my year of imperfection – a curious notion I know but one I have become very attached to. The idea of devoting a year to being imperfect dawned upon me last December. It came from my increasing frustrations with a very small kitchen and a desperate need for sunlight.
So it’s Sunday and it seems an appropriate day to practice being imperfect. My dish of choice is a soufflé; not any soufflé but a Julia Child’s soufflé. I loved the film and when I was in the States last year, I brought that wonderful classic – Mastering the Art of French Cooking.
Now in my year of imperfection, I am making no aspirations towards mastery; instead, all I want to do is cook. So here is:
Chocolate soufflé in a tiny kitchen
The first thing I need to do is get my ingredients sorted and to turn on the oven. I might want to embrace imperfection but a little organisation in the kitchen will be needed. This is a souffle. Conversion via Google and the oven is on, so it heats to 425 (218 C).
Next to my ingredients:
2 cups of milk,
½ cup of white sugar;
1/3 cup of strong coffee;
200 grams of dark 70% chocolate
1/3 cup of what Julia calls all purpose flour and by this I presume that she means plain; and finally six egg whites and four egg yolks, separated of course.
Also vanilla extra – 1 tablespoon and yes, a pinch of salt.

Now it is good thing that this is an imperfect soufflé because already there is yolk in the whites. I have no idea what this means for the final result but the separation of egg is a new experience for me. (I am not a cake baker: the domain of cookery, where such dexterous precision is required.) In a year of perfection, I would have started again, but not this year. My one concession is note to self – buy an egg separator!

Now, and I confess according to the film, The Mastering the Art of French Cookery was originally written for American cooks who did not have domestic help. So I’m hoping given this promise of handholding, so that what followings will not be the collapse of my delicious airy and light soufflé through stress.
(Now just as an example of how frightfully small this kitchen is, I have to balance the cookbook on the side of the sink, so I can read it. This is because the ingredients are taking up the available bench room…)
And so we begin …
Place chocolate and coffee into a bowl over a simmering saucepan of water – the aim is to begin the melting process.

While this is happening, prepare your soufflé dish. Cover the surface with butter. Now I am going to deviate from Julia here and follow Gordon or what I think is Gordon. It’s a half-remembered tip from an online soufflé recipe.
Butter inside of the dish. Place it in the fridge for five minutes and then rebutter it. Finish by coating the inside with some drinking chocolate. Now I have Valrohona and its perfect for such a purpose. It is 100%cacao and when drinking it, it is like drinking silk.
(I’m now having the rest of the coffee that I made earlier – fab stuff from Bon Marche. Very very retro- it’s caramel coffee. The only reason why I am using it is that I have run out of everything else!)
Now Julia says create a collar of butter tin foil. Well I’ve decided that this is getting a little complicated, especially as my chocolate/ coffee mix has now melted and nothing else is prepared!
Now one of the ways to cope with a small kitchen is not to have a lot of stuff – it’s a great excuse only to have GOOD stuff. So with a quick dry, my saucepan is now being used to make the chocolate basis of the soufflé.
Add the flour to the saucepan and slowly add in the milk. This is where I need to stop writing as it is lumpy and the only way to get out of this is to whisk. So I’m whisking.
Crisis averted, or so I think. It is meant to be whisked into the consistency of a smooth cream! Add the butter and stir over moderate heat until boiling. Let boil for two minutes and continue to stir. (Note: it has turned into a smooth cream! Thank you, Julia)

Skimming forward to see what is next, I realise that I still haven’t whisked my egg whites into submission. I have no idea of timing and so I am starting to panic a little. I’m new to this imperfection thing. I want to default to my normal position – extreme multi-tasking. But my second whisk has gone missing and I am forbidden for using the KitchenAid.
So where was I?
Take the chocolate/ coffee mixture from the heat and allow it to cool. Julia says to stir every minute or so to help with the cooling. Taste wise, it’s uninspiring - just butter, milk and flour. It tastes like and is batter. You can see from the picture that it is slightly lumpy.
One by one the egg yolks are whisked into this batter. Finally, you add the melted chocolate/ coffee combo and finally vanilla extract.
My co-conspirator has just come to my rescue and is going to beat the egg whites for me. In a kitchen this small, you need all the outside help that you can get. I stand back in full admission, as he uses his KitchenAid.
So the chocolate sauce is complete and attention now needs to be turned to the egg whites. Unsurprisingly, whisk the egg whites until they form soft peaks. Then slowly, almost sprinkle by sprinkle, add the sugar. What you should get is glossy Disney-like peaks.
 Fold in the chocolate mixture and add to the soufflé dish. (I added the chocolate mix a little at a time, so as not to collapse (is this the right word?) the soufflé mixture
Now I can already tell that I have way, and I mean way, too much egg mixture. At this stage, the kitchen is a complete mess. I find myself turning in circles trying to work out what to do next.
Whatever you do turn the temperature of the oven down to 190 as the soufflé goes in.

Now we wait….
Twenty-two minutes in and it’s looking good. Slightly lope-sided as this is not an oven that cooks evenly. I’m too frightened to open the door and besides I’m exhausted.
I’ve just washed all the dishes that I used and my complaints about lack of bench space and resulted in a reshuffling of monumental proportions. Our idea of having music in the kitchen is now unplugged; the rest, much more bench space.
This whole experience makes me think that my idea of removing everything from the bench-top to cook (like I did at Christmas) is a damn fine idea!
OK… five minutes to go to reach the minimum of 30 minutes. Now I need to wait until the top has cracked. The good news is that it appears to have evened out and can I say it smells fantastic!
I need a skewer to test if it is ready – add to the shopping list. (A word of caution – the problem of coating the inside of the soufflé dish with chocolate is that it will look burnt – it’s not!)

What it has left me wondering is how you could possibly do this for a dinner party. Well, Julia has the answer! You can make this mixture an hour before cooking it. You place it in the prepared soufflé dish and cover it with aluminium foil.
So to the taste…
The texture is light and airy. I can’t taste the coffee but otherwise it is wonderful.
As to what I would do next time – reduce the eggs to five (so five white and four yolks). I think I’d also reduce the chocolate by half.
So as Julia would say Bon Appetite!
Saturday, February 12, 2011
You've got to love Delia
You've got to love Delia, well at least before she released - How to cheat at cooking (more about this later). She was the first British celebrity chef.
Her Seasons collection was my first TV experience of real cookery - not cooking for necessity but cooking as a passion; cooking inspired by ingredients; cooking by the seasons.
Her clipped Britishness, her poshness, her kitchen were exotic to me. It was food with beauty and I was inspired by it. It made me want to cook.
So when looking for something to cook last Saturday night, something simple, something easy; I asked myself, what would Delia cook?
Chicken and leek pie
You'll need:
4 small chicken breasts (I just picked up a four-pack from Waitrose)
3 leeks
3 carrots
A bottle of cider
Some fresh thyme (go for 3-4 sprigs)
Two small bay leaves (or a large one. I have a small plant in my small kitchen)
Packet of store brought short-crust or puff pastry
Like most of Delia's recipe, there is a beautiful simplicity to this recipe. You start by placing in a saucepan, the carrots, thyme, cider, bay leaves, and simmer for five minutes.
As I said, you have to love Delia's understanding of the simple and by this I mean her pairing of favours. In this instance, the sweetness of the cider with the carrot and leek.

Then add the leeks that you have washed thoroughly - think all that grit that you want to avoid. Also add the chicken that you have prepared into pie-sized pieces. Cook for ten.

Her Seasons collection was my first TV experience of real cookery - not cooking for necessity but cooking as a passion; cooking inspired by ingredients; cooking by the seasons.
Her clipped Britishness, her poshness, her kitchen were exotic to me. It was food with beauty and I was inspired by it. It made me want to cook.
So when looking for something to cook last Saturday night, something simple, something easy; I asked myself, what would Delia cook?
Chicken and leek pie
You'll need:
4 small chicken breasts (I just picked up a four-pack from Waitrose)
3 leeks
3 carrots
A bottle of cider
Some fresh thyme (go for 3-4 sprigs)
Two small bay leaves (or a large one. I have a small plant in my small kitchen)
Packet of store brought short-crust or puff pastry
Like most of Delia's recipe, there is a beautiful simplicity to this recipe. You start by placing in a saucepan, the carrots, thyme, cider, bay leaves, and simmer for five minutes.
As I said, you have to love Delia's understanding of the simple and by this I mean her pairing of favours. In this instance, the sweetness of the cider with the carrot and leek.
Then add the leeks that you have washed thoroughly - think all that grit that you want to avoid. Also add the chicken that you have prepared into pie-sized pieces. Cook for ten.
Once the chicken is cooked, drain, making sure that you collect the cider that the vegetables have cooked in.
Place this broth (for want of a better description) back into the saucespan and reduce. Delia's says to reduce to about two tablespoons. I didn't do that but I did reduce it by a least half.
At this stage, turn on your oven to 200 degree or what Delia calls gas mark 6. I was fascinated by gas mark metrics when I watched her shows as a teenager- we didn't have such ovens in Australia.
White sauce ingredients - straight from the larder
275 ml of milk
20 g plain flour
20g of butter
25g of parmesan cheese
Again, we return to Delia's simplcity in this white sauce. Forget the melting of the butter and swift adding of flour and the juggling of pouring milk and whisking. Instead it all goes in there at once (except the parmesan, salt and pepper) and whisk like crazy. The result much to my surprise is a smooth white sauce.
 Once you finish the white sauce, add the parmesan and season. Gently mix the pie mixture into the sauce. The result is a wonderfully sweet and fragant filling.
Next use your store pastry and cover each dish. I went for the short crust. From the ingredients, I made a medium-sized pie in a souffle dish and two individual pieces. I folded the pastry into folds and then brushed with milk. Place in the oven and cook for twenty minutes. The result - a fabulous pie, warming, simple and absolutely, Delia. One final word...
It's about the cheat book. It's a tough one, as I get where Delia is coming from. When most children don't even know what a vegetable is or where food comes from, then the basics shift a little or a lot.
There is no denying that it's probably better for people to cheat and sit down with their kids and eat food than buy pre-made food from a supermarket.
Living in London and being on a London wage, it's easy to forget, some of the harsh economic realities of how people live in Britian. I've always presumed that it is cheaper to buy fresh ingredients and cook them than it is to live on take-away. The reality is... it probably isnt.
What I miss about Australia is the availability of fresh, good food. You don't have to go to a farmer's market, you just go to your local fruit and veg. Here in London at least, I've never really found one. There's Broadway market and Borough market but these aren't cheap.
So is Delia so wrong I ask myself.... what do you think?
Saturday, January 22, 2011
Rabbit stifado and a year of imperfection.
2011 is going to be my year of imperfection. In fact, it is the only resolution that I made this year and so far it is going well, I have to tell you.
Today is the perfect case in point. I have the flu. I have no appetite. My taste buds are refusing to register anything of consequence good OR bad. And I am blogging.
 A rabbit cut into six pieces by your local butcher; 4 tbsps of olive oil; 5 large shallots, left whole; 1 tbsp of tomato paste


Today is the perfect case in point. I have the flu. I have no appetite. My taste buds are refusing to register anything of consequence good OR bad. And I am blogging.
Normally, I wouldn't. I like to craft my words, pausing and deliberating. A state that has often lead to lengthly procrastination and then abandonment. But under the mandate of imperfection, I have to write. That's the point.For all you self-confessed perfectionists, you will appreciate the radicalness of my gesture. To embrace imperfection is to expose your mistakes and recognise that waiting for perfection can be a very long waiting game instead.
So rather than wait, at least until this flu subsides, I did what I had planned to do all weekend - cook Rabbit stifado. This is Greek peasant dish, earnest and rustic, that uses either chicken or rabbit. I went for the rabbit supplied by my local butcher at Highgate.
I love Greek food - from the spices used you can trace the histories of discovery, invasion and colonisation. The sweetness of cinnamon meets the smokedness of all spice in the dish, while also using the essentials of Greek life - olive oil and oregano.
Rabbit stifado (as borrowed from Australian Gourmet Traveller)
Ingredients
As you can see this is not a hard dish nor a particularly expensive one. This rabbit would have easily served four.
A rabbit cut into six pieces by your local butcher; 4 tbsps of olive oil; 5 large shallots, left whole; 1 tbsp of tomato pasteMarinade
150 ml red wine; tbsp red wine vinegar; 2 garlic cloves; 3 fresh bay leaves; 1 cinnamon stick; 4 cloves (which I forgot to put in - as I said I have the flu); 1 tbs of dried oregano (if you can get your hands on the wild greek stuff that would be my preference. The flowers are tigher and the aromatics are wilder and more intense); 1 tbsp of whole allspice berries.

Now to the cooking ... As I suggested earlier, Greek cooking is not hard; well not in my experience of it. There is no particular care required and by that I mean technique. Food was meant to be sustaining in a life that was already hard, so what you see if often cheap ingredients cooked well and made with care.
Begin by marinating the rabbit, preferably overnight. Return to either stir marinate occasionally or use a flat dish.
Using your oil, cook the shallots until softened; remove from the pan and then add your rabbit and brown.
 Once browned, return your onions to your cooking pot and add the marinate, tomato paste and enough water to cover the ingredient.

Cook for between 1-1.5 hours or until rabbit is tender. Serve with crusty bread according to GT or cook some polenta like I did to mop up the juices.
Sunday, January 02, 2011
Merry Christmas 2010
With all the hope that Christmas brings, Merry Christmas 2010 from Sloweater.

12.14 pm and seven hours
It is one of those strange winter days in London. Everything seems dulled after the festivities of Christmas and the New Year. So what's the solution for a day like this - seven hour lamb.
So back from our local supermarket, I am armed with a very small boneless piece of lamb. Not ideal but my thinking is if you cook something for long enough it always tastes good.
Besides I'm in the mood for some nuturing slow cooked goodness. Good food feeds the soul and for me to cook is about love.
So, here are the ingredients - perfect for any larder.
4 anchovy fillets
1 1.8 - 2 kg leg of lamb
3 large cloves of garlic, quartered
Pepper and salt
Olive oil
2 bouquets garnis
1 cup chicken stock
1 cup of dry white wine
Pre-heat your oven to 120 degrees. Dry anchovy fillets on kitchen paper and cut in half. Make six deep incisions into each side of the lamb. Insert a piece of anchovy and a sliver of garlic. Do your normal seasoning with pepper rub in some salt. Seal your lamb and then place in a large french cooking dish in the oven with your stock, wine and bourquet garnis.

That's it. Well it normally is but my piece of lamb is just over a kilogram as there are only two of us and it is also boneless, so I'll check mine around 4.14. I'm let you know.

Anyway, you normally serve with mashed potato. It is a fabulous French dish. The anchovies and garlic combined with the long cooking process turn this dish into butter. Incredible and as I said perfect for the day after new years!
Christmas day 2010 menu
- Chilled pear-infused vodka served with buckwheat blinis with beetroot-cured and orange-cured salmon.
- Ruinart champagne with brie and carmelised onion tartlets and slice of Christmas pork pie with cranberries from Borough market
- Rolled pork loin stuffed with apple, cranberries and fresh walnuts with roast carrots and parnsips and baked apples and beetroot.
- Yuletide cake

Many many thanks to Al and Luke for such a wonderful and special Christmas Day!
Thursday, December 23, 2010
Getting festive
 It is two nights before Christmas and all through the house, a foodie was stirring, in the mood for some curing - some salmon curing that is.
Back from an early trip to Borough market and bolstered by coffee and a fresh Chelsea bun, I’m ready for some cooking in readiness for some Christmas feasting.
The menu has been planned and re-planned. This is the first blog for the appertivo.
Having originally planned to do just beetroot cured salmon and homemade blinis, I felt the need for a contingency plan. Beetroot! Well beetroot can sometimes be a little too beetroot. Having never tried curing before and with the vodka experiment looking all a little dubious, I wanted the safety need of a second option.
So after scouring the internet, I came across this recipe, which I modified. This is the easier of the two, in terms of mess but the smell was heavenly.
Sugar-cured salmon with orange and star anise
250 gram piece of salmon filler, skin on but bones removed (brought from the wonderful Borough market at 08.00 am this morning)
50 g rock salt
50 g sugar
1 star anise, rough crushed
½ orange, zested
1.5 tbsp of vodka
Combine the salt, sugar, star anise and orange zest. The orange zest makes the mixture incredibly moist and combined with the star anise, the smell is wonderful.

Lay the salmon on a plate skin-side down. Spread the mixture over the salmon flesh and sprinkle over the vodka.

Wrap in clingfilm, then put a board on top and weigh it down. I used the jar of vodka that I have been infusing with pear, plum, of which today I added pomegranate.
Leave for 24 hours, but every few hours tip off any liquid that collects.
Beet-root cured salmon
Hold your breath and dive right it. I love beetroot but it is not to everyone's taste. The colour is fantastic; although the puree as described, it is less than appealing– like a large tongue.
Anyway, here’s the recipe. It’s from BBC food and I am citing the original recipe rather than the modifications I made to suit the 200g piece of fish I used.

It has more salt and sugar than the previous recipe, of which I can only guess why. The proof of course will be in the tasting and that will come on Christmas day.
500 - 700g of salmon
8 beetroot

500 g of course sea salt
750g sugar
50ml honey
1 tbs of fennel seeds
Puree the beetroot and add to the combined sugar, salt and ground fennel seeds. Add the honey. Spread generously over the salmon - this is not hard as you can see from the picture below. It is a rich, intense marinate. Cover the salmon with cling wrap. Place in the fridge, weighed under a chopping board with something heavy of top. It stays there for at least 24 hours.
So now, it's time to make your blinis. All I can say is that they are so so easy.
Buckwheat blinis
Ingredients are as follows: 70g buckwheat; the same amount again of plain flour; 1/3 tablespoon of baking powder; 175ml of warm milk (it needs to be warm to dissolve the yeast); 1 egg separate (you will whisk the egg white and add later); 125g butter; 1/3 tbsp of dried yeast.
Begin by combining all the dry ingredients, remember to do the normal sifting of flours. Mix the dried yeast with the warmed milk. Separate your eggs and add the yolk to the dry mixture and combine all. Whisk your egg white until they form peaks and then fold in gently. Don't sidestep this part of the recipe that I'm always tempted to do, as the egg whites make the blinis light.
With the 125 g of butter, clarify it by gently melting in a pan over a low heat. Pour off the yellow liquid. What's left, you need to disguard. Heat the clarified butter and drop in dessertspoons of batter. Turn when the blini starts to bubble.
The result is home-cured salmon with blinis.

Sunday, December 19, 2010
Some winter nostaglia
I make no pretence or claim to be a baker.
Cakes, muffins, scones, have never been a part of my repertoire. If anything, if I was to describe my culinary preferences, I’d say that I was more of your slow cook style of girl.
For me, the longer it cooks the better. Heaven is a seven-hour lamb studded with anchovies and garlic. My favourite thing is my Le Creuset; positioned on my stove-top ever at the ready.
I’m surprised really by my lack of sweet prowess, as I’m more likely to default to a sweet fix than a savoury one. Perhaps my lack of achievement is hereditary, borne out of by a complete lack of necessity.
My mother is a fabulous cook of that 1950s generation of housewife: the first of the mix master set, the original domestic goddess. Hers was the era when efficiency met domestic science and the brand name ruled in the kitchen for the first time.
Saturday was baking day. I used to watch from the sidelines, curious but banned to the perimeter, so that I wouldn’t get in the way. I looked on amazed at her deft hand and her ability to coax and conjure eggs, milk and flour into lightweight concoctions to be decorated with jam and sugar icing. (There was no need to learn how to cook as she was so good at baking.)
So the fact that I find myself posed over a mixing bowl with a spatula in hand, though sans apron, is somewhat surprising. I’d like to think that it’s the Christmas spirit that has inspired my current gesture of cookery – the mini-Christmas muffin.
After two days of picture-perfect snow, one can’t help but think it’s all starting to look, smell and feel a lot like Christmas. And if Christmas inspires anything in me, it’s nostalgia.
My all time favourite (and I mean favourite) winter treat is mince pies. It’s the aroma of clove, ginger, cinnamon, candied fruit and over-generous dustings of icing sugar that I love.
Today most people just buy jars of it. (Mine was purchased yesterday at my local deli – Robertson’s finest classic mince meat (a most curious name when you think about it.)
I know that it doesn’t taste the same as the good stuff – that heady mix of dried fruits, alcohol, peel and spice that was left to ferment in the run up to the Christmas by everyone’s elderly aunt. The apparatus of course was always the large china mixing bowl and the slightly discoloured dampened tea towel.
Anyway, so two days of snow and here I am in the kitchen waiting patiently for my mini-muffins to cook. Having peered into the oven, there’s not so mini anymore. I added an extra tablespoon of mincemeat to the mixture and I think that they are now weighed down by too much nostalgia.
But the smell of the kitchen is as it as it should be: warm and peppered with the smells of flour and egg, dark chocolate and mincemeat.
The perfect treat on a cold Sunday just before Christmas.
Christmas mini-muffins (courtesy of BBC Food)
200 grams of self-raising flour (sifted)
100g golden caster sugar ( I just used normal)
100 ml sunflower oil
75ml milk
1 large free range egg
1 heaped tablespoon of high quality mincemeat (not sure what makes high quality but Robertson has a royal warranty, so presumeably it hits the mark)
50 grams of dark chocolate
 Now before we go any further I need to say the recipe recommends that the mixture is divided in half and combined with 50 grams of dried cranberries and 50g of white chocolate. I decided to devote all my mixture to mincemeat and dark chocolate.
While pausing, I should also add that I got a little confused with my measurements and while I added two extra heaped tablespoons of mincemeat, I forgot to add more chocolate. (I've just tasted one from the over and it tasted pretty good to me.
So you pre-heat the oven to 190C. While the oven is heating, mix together the flour and sugar.
The result is muffins that will never ever look like the beautiful miniture pudding-like muffins on the website. Instead, they look like something a Christmas grinch would have made - neither muffin nor Christmas canape!
They do taste delicious, and once I make the icing, I think they'll serve the purpose of achiving some winter cheer.
Cakes, muffins, scones, have never been a part of my repertoire. If anything, if I was to describe my culinary preferences, I’d say that I was more of your slow cook style of girl.
For me, the longer it cooks the better. Heaven is a seven-hour lamb studded with anchovies and garlic. My favourite thing is my Le Creuset; positioned on my stove-top ever at the ready.
I’m surprised really by my lack of sweet prowess, as I’m more likely to default to a sweet fix than a savoury one. Perhaps my lack of achievement is hereditary, borne out of by a complete lack of necessity.
My mother is a fabulous cook of that 1950s generation of housewife: the first of the mix master set, the original domestic goddess. Hers was the era when efficiency met domestic science and the brand name ruled in the kitchen for the first time.
Saturday was baking day. I used to watch from the sidelines, curious but banned to the perimeter, so that I wouldn’t get in the way. I looked on amazed at her deft hand and her ability to coax and conjure eggs, milk and flour into lightweight concoctions to be decorated with jam and sugar icing. (There was no need to learn how to cook as she was so good at baking.)
So the fact that I find myself posed over a mixing bowl with a spatula in hand, though sans apron, is somewhat surprising. I’d like to think that it’s the Christmas spirit that has inspired my current gesture of cookery – the mini-Christmas muffin.
After two days of picture-perfect snow, one can’t help but think it’s all starting to look, smell and feel a lot like Christmas. And if Christmas inspires anything in me, it’s nostalgia.
My all time favourite (and I mean favourite) winter treat is mince pies. It’s the aroma of clove, ginger, cinnamon, candied fruit and over-generous dustings of icing sugar that I love.
Today most people just buy jars of it. (Mine was purchased yesterday at my local deli – Robertson’s finest classic mince meat (a most curious name when you think about it.)
I know that it doesn’t taste the same as the good stuff – that heady mix of dried fruits, alcohol, peel and spice that was left to ferment in the run up to the Christmas by everyone’s elderly aunt. The apparatus of course was always the large china mixing bowl and the slightly discoloured dampened tea towel.
Anyway, so two days of snow and here I am in the kitchen waiting patiently for my mini-muffins to cook. Having peered into the oven, there’s not so mini anymore. I added an extra tablespoon of mincemeat to the mixture and I think that they are now weighed down by too much nostalgia.
But the smell of the kitchen is as it as it should be: warm and peppered with the smells of flour and egg, dark chocolate and mincemeat.
The perfect treat on a cold Sunday just before Christmas.
Christmas mini-muffins (courtesy of BBC Food)
200 grams of self-raising flour (sifted)
100g golden caster sugar ( I just used normal)
100 ml sunflower oil
75ml milk
1 large free range egg
1 heaped tablespoon of high quality mincemeat (not sure what makes high quality but Robertson has a royal warranty, so presumeably it hits the mark)
50 grams of dark chocolate
 Now before we go any further I need to say the recipe recommends that the mixture is divided in half and combined with 50 grams of dried cranberries and 50g of white chocolate. I decided to devote all my mixture to mincemeat and dark chocolate.
While pausing, I should also add that I got a little confused with my measurements and while I added two extra heaped tablespoons of mincemeat, I forgot to add more chocolate. (I've just tasted one from the over and it tasted pretty good to me.
So you pre-heat the oven to 190C. While the oven is heating, mix together the flour and sugar.
I did this by hand - there is no need to put out the KitchenAid. Now we have a KitchenAid in our house - it belongs to my co-conspirator. He is the baker. He highly recommended that I hand mix these ingredients. I suspect he did this because (1) it is more than possible to and (2) he likes to keep me away from his cherry-red anniversary KitchenAid.
Having mixed the flour and sugar, in a separate bowl, whisk the oil, egg and milk and then slowly add to the dry ingredients.
Combine, so you get a mixture that is the equivalent of a batter. Then add your mincemeat and chocolate, which you have chopped. Mix everything together and place in mini-muffing cases.
Now according to the BBC, I should have used a mini-muffin tray and I would have except that I don't have one. Our kitchen can barely cope with the Le Creuset and tagine on the stove and the KitchenAid. So, I just used a normal muffin tray.
The result is muffins that will never ever look like the beautiful miniture pudding-like muffins on the website. Instead, they look like something a Christmas grinch would have made - neither muffin nor Christmas canape!
They do taste delicious, and once I make the icing, I think they'll serve the purpose of achiving some winter cheer.
Pear infused vodka
You’ll find one in every in-flight magazine: the 24 hours in ... (insert a city) travel article. It's compulsory reading somewhere between the boredom of overhead safety procedures and the snack service.
For even the most independent traveller, there is something slightly glamorous about this promise of the 24-hour experience. You arrive relaxed and eager, armed with insider knowledge, confident of where to go, and what to see.
So hopefully, you can empathise and forgive me for my lapse in judgement. My ticket said departure time Saturday at 9.10 and returning at 5.15 pm the following day. Destination: Vienna.
What followed was less than the promised 24-hour travel article experience. Now I do not want to dwell on the details and it was still a wonderful experience. But letters have been written, another trip planned and a national airline has been added to the blacklist!
The highlight of this shortened trip was the outstanding, sublime and trully extraordinary Christmas vodka served at Restaurant Zum Kuckuck.
The beauty of this apertif, blushed pink with pear and plum, and served at the start of our meal was inspiring. One bottle of vodka later, the experiment begins:
Pear infused vodka
Take 750 mL vodka; Six Bartlett pears, cut into eight slices and four plums, cut into quarters.
Place fruit in container and add the vodka.
Now from there, you are subject to the various laws of fruit infusion and alcohol.
Somewhere, there must be a definite guide. I haven't found it - a little like the promise of the 24-hours travel experience; however, this is what I have learnt:
For even the most independent traveller, there is something slightly glamorous about this promise of the 24-hour experience. You arrive relaxed and eager, armed with insider knowledge, confident of where to go, and what to see.
So hopefully, you can empathise and forgive me for my lapse in judgement. My ticket said departure time Saturday at 9.10 and returning at 5.15 pm the following day. Destination: Vienna.
What followed was less than the promised 24-hour travel article experience. Now I do not want to dwell on the details and it was still a wonderful experience. But letters have been written, another trip planned and a national airline has been added to the blacklist!
The highlight of this shortened trip was the outstanding, sublime and trully extraordinary Christmas vodka served at Restaurant Zum Kuckuck.
The beauty of this apertif, blushed pink with pear and plum, and served at the start of our meal was inspiring. One bottle of vodka later, the experiment begins:
Pear infused vodka
Take 750 mL vodka; Six Bartlett pears, cut into eight slices and four plums, cut into quarters.
Place fruit in container and add the vodka.
Now from there, you are subject to the various laws of fruit infusion and alcohol.
Somewhere, there must be a definite guide. I haven't found it - a little like the promise of the 24-hours travel experience; however, this is what I have learnt:
- You use a large glass container with an airtight lid for your infusion.
- The infusion is only as good as the vodka - so as in most things in life, buy the best one you can.
- As the fruit absorbs the vodka, you 750 ml bottle will reduce to three cups.
- To chill or not to chill: some articles say a dark cardboard; other says the fridge for faster results. I want to have mine on Christmas day, so it's in the fridge.
- To make citrus vodkas use the peel of the fruit. Do not infuse too long as the vodka will become bitter.
- Continually taste the infusion
Infusion analysis:
- End of day one: Clear liquid. No discolouration of fruit.
- Day three: Beginnings of colouration. Blush hue. Fruit has began to discolour. Feeling optimistic.
- Day five: Taste test. Despite the promise of colour which is now very blush, there is no hint of fruit in the taste. Do I add more fruit? The fruit has started to disintegrate. On Monday it will be one week since this process began. Might need to consult further.
- Day twelve: Remain highly suspicious of the outcome. The fruit is now very brown and there have been no further changes to the colour or the taste of the vodka. Christmas is in three days. Consult my beloved co-conspirator. He suggests raspberries. As we are off to Borough market tomorrow for provisions we agree to look for some .
- Day thirteen: Back from market. Have added pomegrantite seeds. Such a magnificent colour. Also decide to add some sugar - just a dessert spoon to try and improve the taste.
- Day fourteen: The first thing I do when I wake up is check the vodka. An almost miraculous change in colour. Taste has also improved. I remain suspect but we'll see.
Christmas day: Serve vodka in frozen glasses with homemade cured salmon. A big hit!
Sunday, October 31, 2010
Where the wild things are ...
It’s autumn in London.
The deciduous trees are on the verge of shedding all their leaves but not without a last flash of riotous colour. Golden yellows, burnt crisp oranges and red, the colour of an old Shiraz are everywhere. This is the residue of seasonal colour before descending into the bareness of winter.
The days are shortening. It’s November. Some days the sun is defiant, resisting the call of winter; other days, it appears to have just given up.
With such seasonal thoughts, my mind has thinking of wild things.
At our local farmers market, there has much to choose from – pheasant, mallard, guinea fowl as well as the last of the berries, new cabbages and broccoli, marrows and gourds.
Everything needed for an autumnal feast.
(Adapted from a recipe from Mark Hix)
One mallard
1 small onion
1 carrot
2 sticks of celery stalks
A few springs of thyme
A little butter
1 glass of red wine
½ teaspoon of redcurrant jelly
500ml chicken stock
½ punnet of blackberries
1 golden gourd
1 bunch of purple broccoli
Preheat oven to 230C. Rub the mallard with butter and season. Place in roasting tray with onion, carrot and celery diced beneath with thyme. Cook for 30 minutes and then remove bird from tray and let it stand.
Turn the heater on and enjoy the beginning of the winter season.
The deciduous trees are on the verge of shedding all their leaves but not without a last flash of riotous colour. Golden yellows, burnt crisp oranges and red, the colour of an old Shiraz are everywhere. This is the residue of seasonal colour before descending into the bareness of winter.
The days are shortening. It’s November. Some days the sun is defiant, resisting the call of winter; other days, it appears to have just given up.
With such seasonal thoughts, my mind has thinking of wild things.
At our local farmers market, there has much to choose from – pheasant, mallard, guinea fowl as well as the last of the berries, new cabbages and broccoli, marrows and gourds.
Everything needed for an autumnal feast.

(Adapted from a recipe from Mark Hix)
One mallard
1 small onion
1 carrot
2 sticks of celery stalks
A few springs of thyme
A little butter
1 glass of red wine
½ teaspoon of redcurrant jelly
500ml chicken stock
½ punnet of blackberries
1 golden gourd
1 bunch of purple broccoli
Preheat oven to 230C. Rub the mallard with butter and season. Place in roasting tray with onion, carrot and celery diced beneath with thyme. Cook for 30 minutes and then remove bird from tray and let it stand.

To make gravy, add ½ of a tablespoon to the roast dish. Add wine and jelly, and then gradually the stock for 10 minutes. Using a sieve, strain the gravy and then add blackberries, returning the gravy to the heat to thicken.
For vegetables, cut the gourd into crescent pieces and roast. Once removed from oven, mix through a dessert spoon of honey. As for broccoli, blanche in boiling salted water for two minutes, before cooking in olive oil favoured with garlic. The broccoli will fade into a soft lavender colour.

Serve mallard with blackberry gravy and seasonal vegetables, decorated with left over blackberries.
Turn the heater on and enjoy the beginning of the winter season.
Sunday, July 18, 2010
Four years in London
 Four years of eating, traveling, of being a slow eater. So looking back, here are some of my favourite moments, in no particular order:
- Discovering the joys of open-air dining in the Gaudi Park in Barcelona with Luke. First stop, the market; second stop, art. Classical guitar could be heard in the distance as we sat enraptured and amazed that we had fallen in love. Perfect.
- My three-hour lunch with Angelo, the mysterious Italian, at the Slow Food Osteria Da Mario near the central market in Florence.
- On the Isle of Skye, driving with my parents down sheep tracks to find one of the world's most remote restaurants. What followed at the Three Chimneys, the food, atmosphere and location, is one of my most memorable three-hour lunches.
- Cooking English sausages from Parson's Nose, my then local butcher, for three starved Aussies - Warren, Eli and Jamie.
- Misbehaving and badly with my friend of a lifetime, Warren, at the Loos Bar in Vienna.
- Going native at a local Parisian market with Al and Luke and cooking a wonderful dinner of heritage carrots, caramelised endive and what has since been dubbed, the yellow chicken- stuffed with fresh herbs and day old croissant.
- Celebrating something - I can't remember what, at the Ritz with Luke and drinking Ritz 100s, watching as the gold leaf floated to the top of the glass as it dissolved in the champagne.
- Being introduced to Bob Bob, that's Bob Bob Ricard, by our friend Alana and sampling some of the best kedgeree, I have ever tasted. All on an ordinary London Saturday.
- Eating oysters with HJ and Luke in NoHo, San Francisco. We'll have another dozen please!
Here's a close up - it's London in summer. Just like today. (if you click on the picture you can see the detail.)

Subscribe to:
Posts (Atom)

 Posts
Posts


